Hello everyone! Today I want to spend a couple of lines to the recent works me and @PinkiePieStyle did with some notes about how we built it.
I’ll also start all of this with how easy is to get your environment ready to rock.
If anything stated here is not working on your env, your pr is really welcome 🙂
Get your box ready
is pretty easy. Everything you need to do is setup frida, with the server in any supported device, and radare2.
Following, you will have to clone Dwarf and setup the pypi requirements (follow readme).
Attach your target
is once again pretty easy. You can start dwarf with:
python3 dwarf.py
and follow the ui to spawn or attach your target, or, you can use command line args to do it faster:
igio90@igio90-P7xxTM1:~/projects/python/Dwarf$ python3 dwarf.py --help
usage: dwarf.py [-h] [-t TYPE] [-s SCRIPT] [-p PACKAGE] [-dev DEVICE] [-bs]
                [-sp] [-ds]

optional arguments:
  -h, --help            show this help message and exit
  -t TYPE, --type TYPE  SessionType - android, ios, local, remote - default:
                        local
  -s SCRIPT, --script SCRIPT
                        Path to an additional script to load with dwarf and
                        frida js api
  -p PACKAGE, --package PACKAGE
                        Attach Dwarf to given packagename
  -dev DEVICE, --device DEVICE
                        DeviceSerial adb devices
  -bs, --break-start    break at start
  -sp, --spawn          force spawn
  -ds, --debug-script   debug outputs from frida script
Introducing the usage case
I’ll let you get inside the loop with a simple and powerful example which will help understand the process.
- create a directory scripts in dwarf path
dwarf_path/scripts/ - create a file agent.js inside the scripts folder with the followng content
dwarf_path/scripts/agent.js
// shortcuts for Interceptor.attach and Module.findExportByNam
api.hookNative(api.findExport('open'), function(args) {
    var breakpoint = true;

    // meant to show how you can avoid breakpoint and just log informations
    if (!breakpoint) {
        console.log('hit open, skipping break');
        return -1;
    }
});
Now we can start dwarf assuming our target device is Android
python3 dwarf.py -t android -p com.twitter.android -sp -bs -s scripts/agent.js
It is also possible to run a target in the local machine, assuming you are with linux (there is no support for bs flag in linux. supported os at the moment are android and windows – so there is no JVM debug as described in following lines):
python3 dwarf.py -t local -p /bin/man -sp -s scripts/agent.js
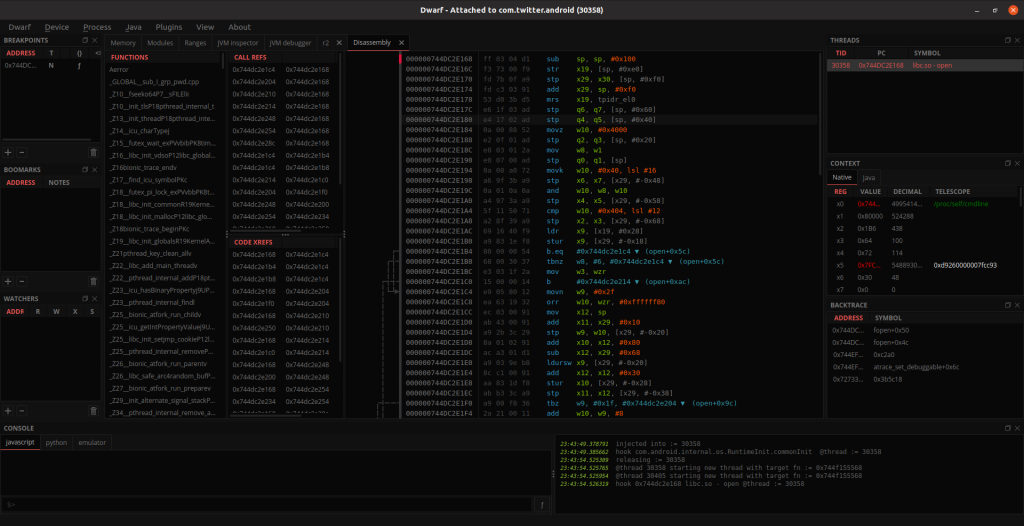
What we did is spawning an instance of the Twitter app, if in android, otherwise man in linux, injected our agent and break it at zygote to allow us to perform initial analysis.
We are going to see the first screen of the UI with the JVM debugger since the breakpoint set with flag ‘-bs’ is in zygote. This is fully navigable. In the various panels you will have breakpoints, watchpoints, notes, switchable threads if different threads hit a breakpoint, context registers and arguments, modules, ranges, disassembly and hex views, searches and so on.
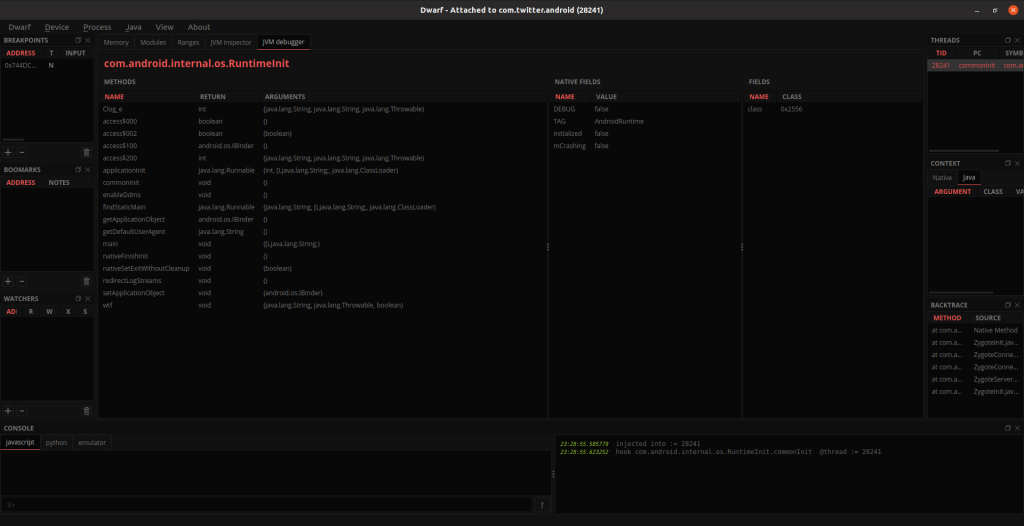
You will have 3 consoles with the javascript one accepting frida and dwarf api. In the breakpoint panel, on the top left, you’ll have the breakpoint we set on our agent.js (open plt).
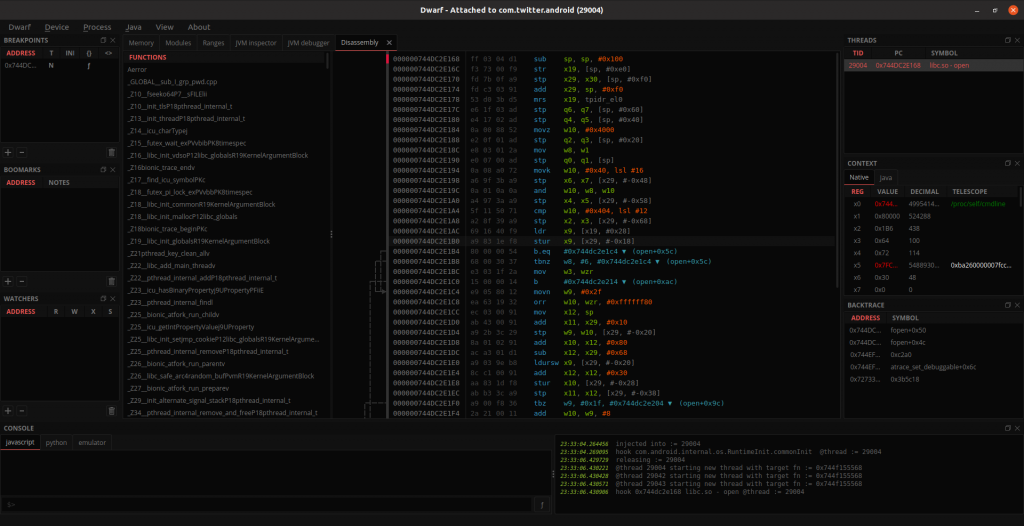
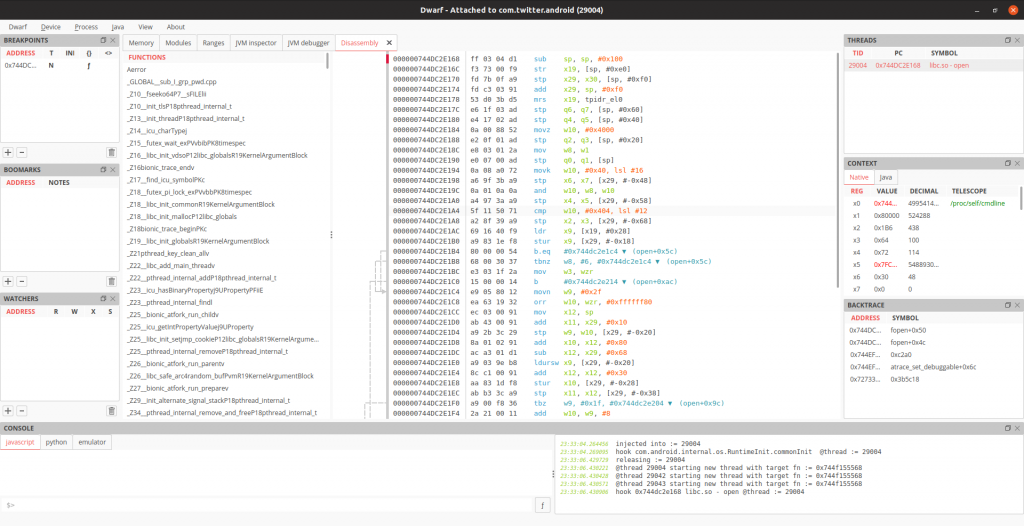
We can resume the execution of the app in the top menu process->resume, or by hitting F5.
At this point we are going to hit a breakpoint in open, the disasm view will appear with the list of functions on the breakpoint range. Registers with values are displayed as well on the right side with backtrace above it.
(Bonus: you have themes on the top menu and you can move the panels around).
Let R2 join the party
If you have installed radare2 locally you can integrate it into dwarf with r2dwarf plugin.
To install it, simply create a plugin folder in the dwarf path, cd into it and run:
git clone https://github.com/iGio90/r2dwarf
There is also support for r2dec, which can be installed with r2pm:
r2pm -ci r2dec
In the first stage of implementation, we were relying on r2frida as an io, basically, to read and write from/to the r2 instance and the target. Due to a double, and non needed, read from target memory – first time read memory for disassemble, second time read from r2frida to r2 instance – I decided to write an own r2 pipe and own io so to use the same information provided by our already existing agent.
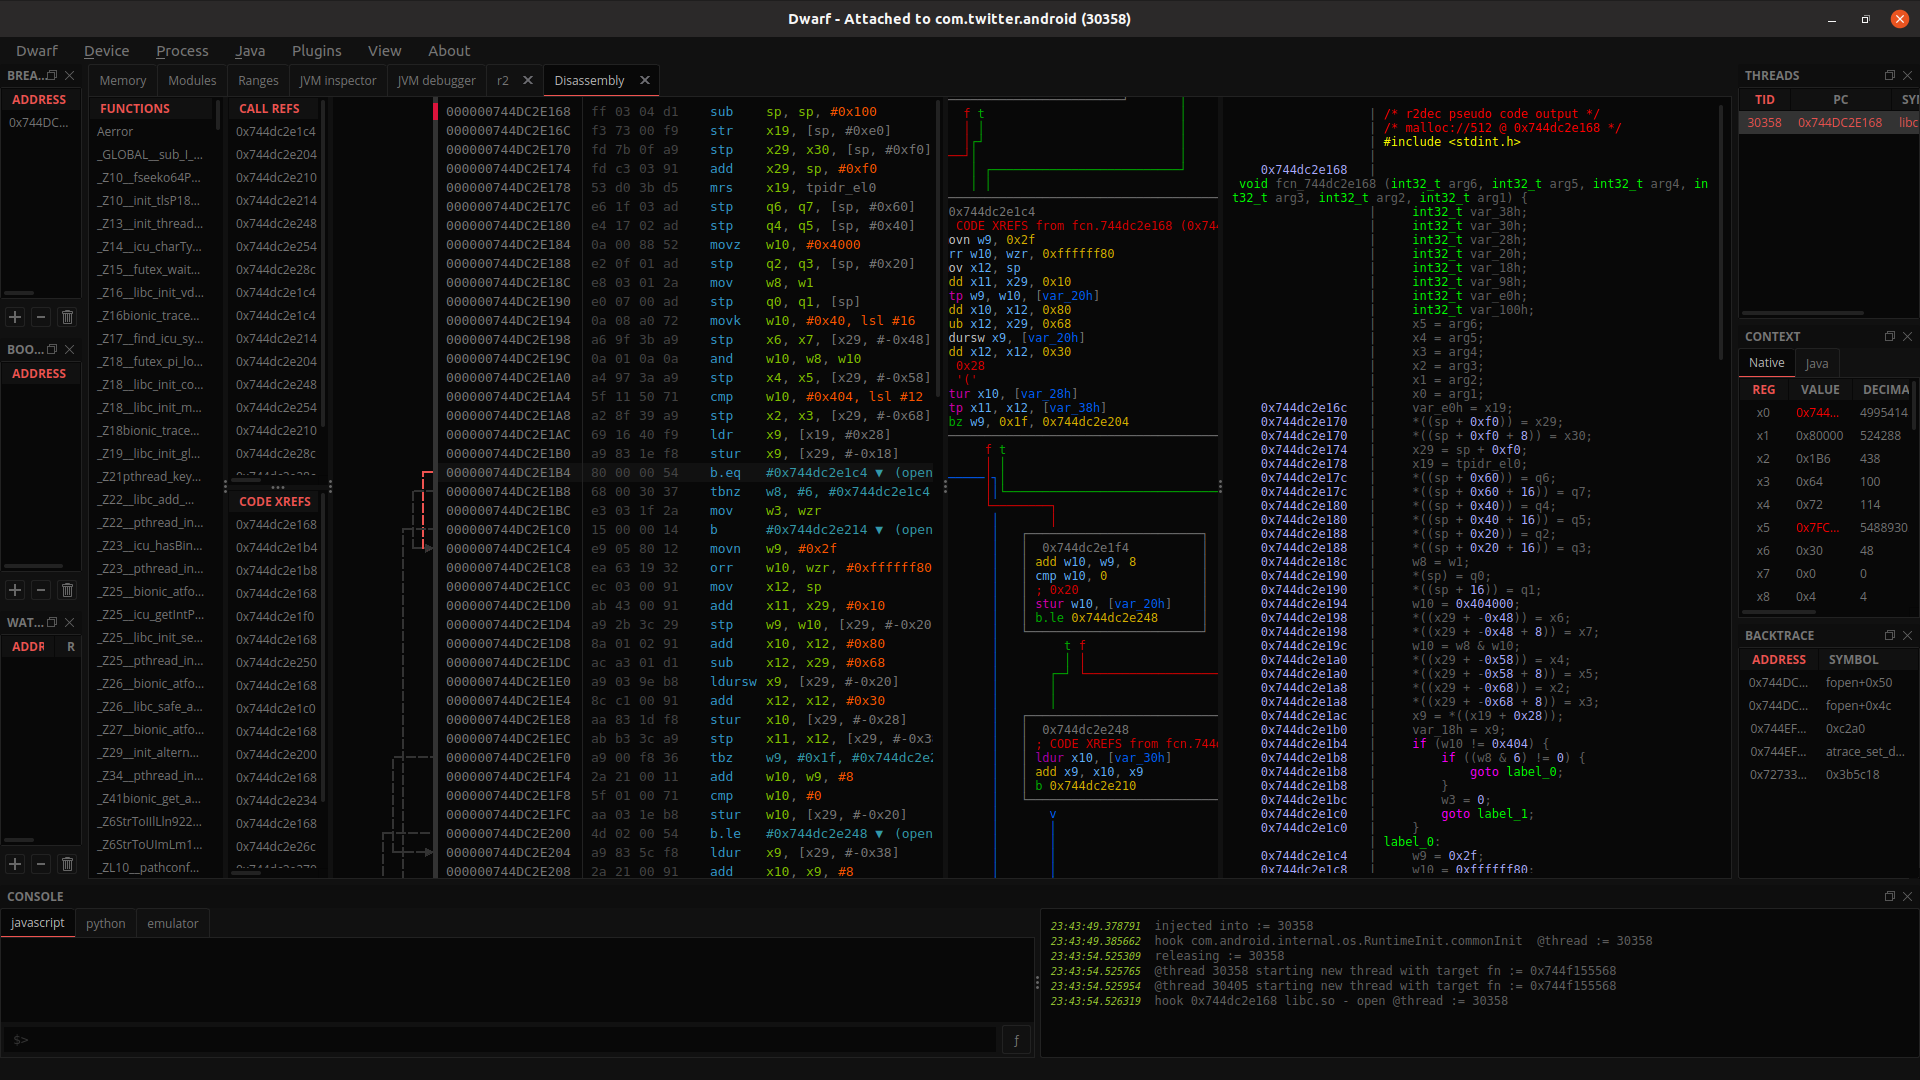
This is how the ui change when you install r2 plugin:
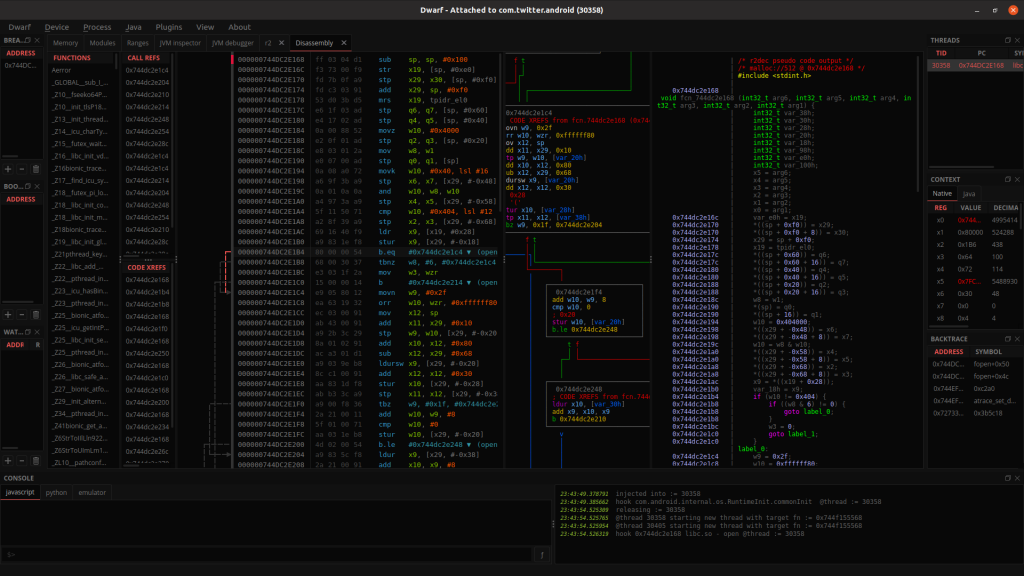
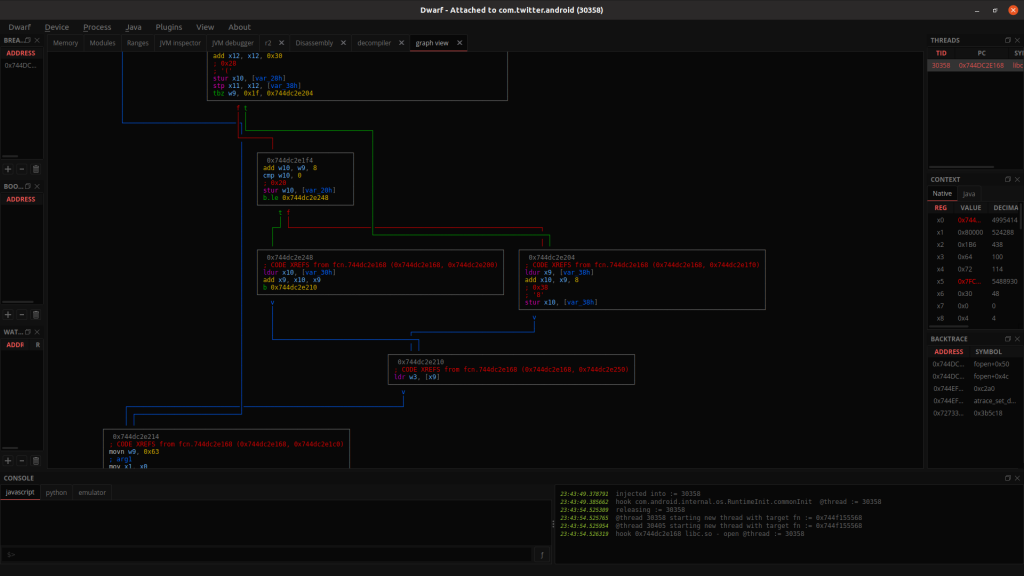
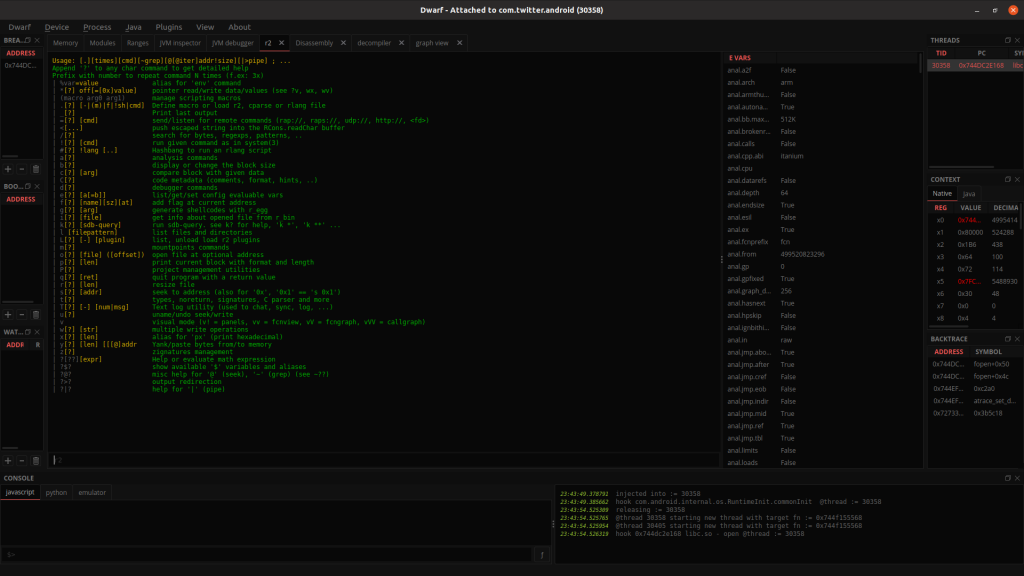
A new tab with an r2 console and editable list of current env flags will appear, the disassembly view will be enriched with function analysis, graph and decompiler views which are totally backended by r2.
For what concer automation, I did also added a javascript synchronous api to use the r2 instance in py backend from your target js agent (play with both frida and r2 api in the js target side). In example, we can edit our previous agent.js with the following code:
var target = api.findExport('open');
api.hookNative(target, function(args) {
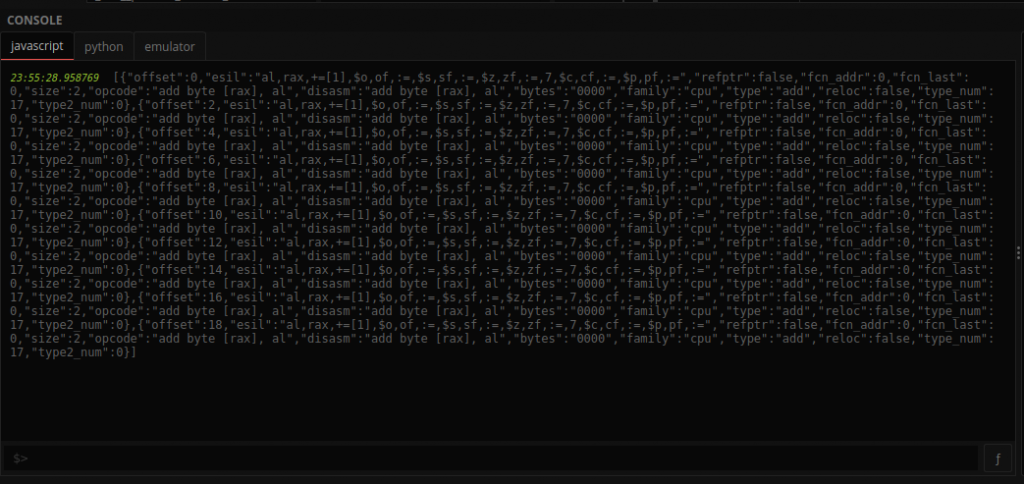
r2('s ' + api.findExport('open'));
var result = r2('pdj 10');
console.log(result);
// one shot
api.deleteHook(target);
});
Hopefully i’ve covered how you can start and extend your sessions with dwarf. You can also create with ease your own plugins to add UI elements and speak with frida (checkout the plugin intro here). It’s a non ending wip as it’s not our main priority (free time project), but it’s very powerful, imho. Keep use it and report us all unexpected behaviors!


One Comment
Dominican Peso